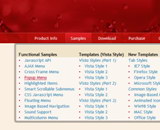
Large Horizontal Menu Dhtml by Deluxe-Menu.com
Large Horizontal Menu Dhtml

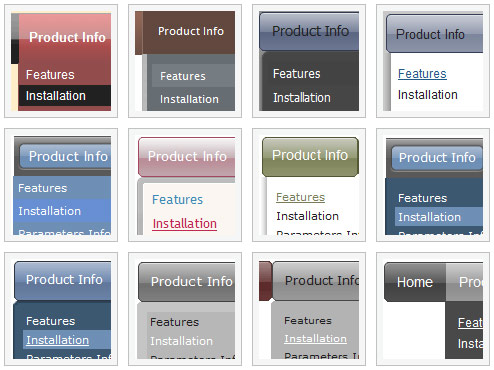
Menu Screenshots

Large Horizontal Menu Dhtml Several Menus On One Page Different Transition Effects

Features

Compatibility              
  • Full cross-browser compatibility including IE, Netscape, Mozilla, Opera, Firefox, Konqueror and Safari on Windows, Mac OS and Linux
  • Menu can be populated from a database using ASP, PHP, etc.
  • Search engine friendly
  • Support for any doctypes
  • Fits for secure sites
  • Section 508 compliant
Seamless Integration
  • Cross-frame support - menus work on frameset-based pages
  • Visible over flash, select boxes, iframes, java applets
  • Multiple menus on the same page
  • Amicable to other scripts and css styles
  • Any HTML code can be used inside menu items
Web Menu Expanding Large Horizontal Menu Dhtml
High Performance
  • AJAX menu loading - loads web menu data from the server "on-the-fly".
  • Commonly loads quicker than other html page elements
  • UL/LI items structure
  • Runs well with an unlimited number of submenus and items
Unrivalled Features
  • Scrollable, dragable, floating, right-click menus
  • Keyboard navigation - press Ctrl+F2 to enter the menu
  • Unique Java Script API for altering menu "on-the-fly", without page reloading
  • AJAX technology - loads menu data from the server "on-fly and on-demand".
  • Search feature - add the search area in the menu and type symbols. The found words will be higlighted.
  • Sound support!
Cost Effective


2.0 Buttons by Web-Buttons.com v3.0.0

Javascript Menu. DHTML Menu.

  • Submenus can be shown in 4 ways: - From from left to right + upwards and also left to right. - From right to left and also from right to left + upwards (e.g. for right-to-left languages).
  • Use images for icons, backgrounds of submenus and items. Using images you can create menus entirely based on graphics.
  • Create both horizontal and vertical menus and submenus with any amount of menus on one page.
  • Insert any HTML code inside the menu item - be it a form or a picture, a flash-object or a text. This ability allows you to create various menus of any complexity.

Recent Questions

Q: Can the main menu items be set so they are all the same width without specifying pixel widths?


A: You should create Individual Style and assign this style for allitems.

  var itemStyles = [
["itemWidth=150"], //style 0
];

  var menuItems = [

["DHTML Menus","", "images/icon1.gif", "images/icon1o.gif", , ,"0", , , , , ], // assign style 0
["Apycom products","", "images/icon1.gif", "images/icon1o.gif", , , "0", , , , , ], // assign style 0
["Contacts","http://www.apycom.com/contact.html", "images/icon1.gif", "images/icon1o.gif", , , "0", , , , , ], // assign style 0
];


Q: I am having some difficulty dynamically adding items to a tree javascript and menu.

I have a menu with one "root" item. I see the use of the "+" symbol within the item name. I do not see any documentation regarding this symbol, only "|". Can you explain?

If I have one menu with this one "root" node, how would I add an subitem to this root node?

Here is my code so far, but the inserted items appear to be at the same level as the root node.

  var rootItem = dtreet_ext_getItemIDByIndex ( 0,0 );

  var menuItem = new Array(10);
for (   var i = 0; i < producers.length; i++ )
{
  var producer = producers[ i ];
menuItem[0] = producer.name;

dtreet_ext_insertItem ( 0, 0, i + 1, menuItem );

A: See dtreet_ext_insertItem () function has the following parameters:

function dtreet_ext_insertItem (menuInd, parentItemID, itemInd, itemParams)

Creates a new item and inserts it into a specified position.
menuInd - index of a javascript and menu on a page, >= 0.
parentItemID - ID property of an item.<, >= 0.
itemInd - index of a new item within the javascript and menu, >= 0.
itemParams - item parameters.

Notice that parentItemID is the Id property of the parent item (notindex). If you want to add top items you should set parentItemID=0.

itemInd - you should use this parameter if you want to add item in thespecific place, for example set itemInd=5 if you want to add itembefore the existing item with itemInd=5.
If you set itemInd=null the new item will be added at the end of this submenu and its index will be added automatically.


Q: I am using cross frame menu dropdown. I have three frames: Top, Left and main (middle).

I am using the script and data from your sample file; it works fine. Only problem is submenu is offset to the right. It does not show up exactly down below the top menu.

What could be the problem?

A: Deluxe Menu doesn't work correctly (incorrect submenu position) if youhave complex frame structure.

The problem is in a structure of your frameset.
Mozilla browsers can't determine absolute coordinates for a frame, so submenus drop down with an offset.

You should create, for example, the following frameset structure:

--|------------
   | menu
--|------------
   |
   | submenus
   |

Now a top row has 2 columns and all browsers can determine a width of the 1st column in the second row.

You should write init function in the following way in that case:
dm_initFrame("mainframe",1,3,0);


Q: I have small problems with your javascript menu system.

#1. I am creating a multi-level menu, am I limited to a gird format or can every item have a variable column width?

#2. With submenus, I want to have the submenu be the same width as the parent cell, is there a simple command for this, or do I have to guess the column widths until it fits correctly?

#3. In those same submenus, I have items that are longer than the parent, is there a word wrap or a way to define a break, rather than having the scroll feature?


A: 1) You should use Individual Item Styles.
For example:
  var itemStyles = [
    ["itemWidth=120","itemBorderWidth=1","itemBorderStyle=solid,solid","itemBackColor=#ACF88B,#ACF88B","itemBorderColor=#329309,#329309"], //style0
    ["itemWidth=100","itemBorderWidth=1","itemBorderStyle=solid,solid","itemBackColor=#FFFFFF,#FFFFFF","itemBorderColor=#1B92E9,#1B92E9"], //style1
    ["itemWidth=130","itemBorderWidth=1","itemBorderStyle=solid,solid","itemBackColor=#FF9684,#FF9684","itemBorderColor=#EC7575,#EC7575"], //style2
    ["itemWidth=150","itemBorderWidth=1","itemBorderStyle=solid,solid","itemBackColor=#84F9FF,#84F9FF","itemBorderColor=#00B8C1,#00B8C1"], //style3
];
  var menuStyles = [
    ["smColumns=2"], //style0
];

    ["Home","testlink.htm"],
    ["Samples","testlink.htm"],
      ["|Group 1","", , , , , "0", , , ],
      ["|Group 2","", , , , , "1", , , ],
      ["|Group 3","", , , , , "2", , , ],

...
    [" More Samples","testlink.htm"],
      ["|Group 1","", , , , , "3", "0", , ],
      ["|Group 2","", , , , , "1", , , ],

Where "0", "1", "2", "3" - style number in itemStyles.

2) You can also use Individual Item Styles.

  var itemStyles = [
     ["itemWidth=120px"],
];
  var menuStyles = [
     ["smWidth=120px"],
];

    ["Product Info","", "default.files/icon1.gif", "default.files/icon1o.gif", , , "0", , , ], // itemStyles
      ["|Features","testlink.html", "default.files/icon2.gif", "default.files/icon2o.gif", , , , "0", , ],
      ["|Installation","", "default.files/icon2.gif", "default.files/icon2o.gif", , , , , , ], // menuStyles

3) Try to set this parameter:

  var noWrap=0;