Recent Questions
Q: I have one more question before I purchase alicense: is there a way to use images instead of text as the menu items?
A: Yes, you can create image-based menu.
If item text is empty, icon fields will be used as item images.
For example:
["", "index.html", "itemImageNormal.gif", "itemImageOver.gif", "Home Page"]
Q: It seems that if I try and use the syntax ["| with some HTML such as <DIV class = 'myclass'> inside dropdown menu it IGNORES the HTML and just treats it like another link.
But if I don't start the line with ["| ..... Then I get a syntax error.
For example:
I am trying to place 4 links in a square shape in the top left of my screen. To do this I was going to create DIV's and set the TOP and LEFT to different values from within a loop (I left out the code that does the updating for myleft and mytop...)
var menuItems = [
<loop>
["|<div style='position: absolute; left: <cfoutput>#myleft#</cfoutput>px; top: <cfoutput>#mytop#</cfoutput>px>'","", "", "", "", "", "", "", "", "", "",],
["|#ParentMenuDesc#","index.cfm?Workflow=#Workflow#&role=#Privilege_id#&cacheid=#createuuid()#&Process_Type=#Process_Type#&PageMode=#Process_Logic#", "#menu_option_icon#", "", "", "_top", "", "", "", "", "",],
["|</div>","", "", "", "", "", "", "", "", "", "",],
<end loop>
];
What am I doing wrong here?.... Can you show me how to accomplish this task?
A: No, this syntax is incorrect. It won't work.
var menuItems = [
<loop>
["|<div style='position: absolute; left: <cfoutput>#myleft#</cfoutput>px; top: <cfoutput>#mytop#</cfoutput>px>'","", "", "", "", "", "", "", "", "", "",],
["|#ParentMenuDesc#","index.cfm?Workflow=#Workflow#&role=#Privilege_id#&cacheid=#createuuid()#&Process_Type=#Process_Type#&PageMode=#Process_Logic#", "#menu_option_icon#", "","", "_top", "", "", "", "", "",],
["|</div>","", "", "", "", "", "", "", "", "", "",],<end loop>
];
You should have <div> ... </div> tags in each dropdown menu item!
It is not correctly to write <div> ... </div> tags for wholesubmenu.
var menuItems = [
["|<div style='position: absolute; left:<cfoutput>#myleft#</cfoutput>px; top: <cfoutput>#mytop#</cfoutput>px>text</div>'","", "", "", "", "", "", "", "", "", "",],
["|#ParentMenuDesc#","index.cfm?Workflow=#Workflow#&role=#Privilege_id#&cacheid=#createuuid()#&Process_Type=#Process_Type#&PageMode=#Process_Logic#", "#menu_option_icon#", "","", "_top", "", "", "", "", "",],
["| ","", "", "", "", "", "", "", "", "", "",],
];
Q: I'm fairly new to HTML and Java. I'm using your popup window html, (its great) but do notknow how to use the "ID object" function. I'm using Frontpage as my HTML editor. The only way I can figure out how to give "a line of text" or a "Graphic" and ID is to create a "Layer". That creates an (ID) in the HTML script. But I still cannot get the pop up to work when clicking the object. How is the best way to create an object ID that will all Deluxe pop-up to recognize it?
Can I have two separate pop-up within the same html page?
One last thing...Can I create a pop up that fly's out after 10 seconds, and within that fly out have a link that opens another pop up with important info in it using the iframe feature?
This sound like novice questions, but that's me!
A: See you can show the popup window when you hover, click or mouseout on some elements on yourpage. For example you've added an image in the FrontPage. Right click on this image and goto "Picture properties...", on the Appearance tab select 'Style...' and enter any text inthe ID field, for example 'open_popup'. Switch to 'Code' mode, you'll have the followingcode:
<p><img border="0" src="images/submenu-bg.gif" width="170" height="29" id="open_popup"></p>
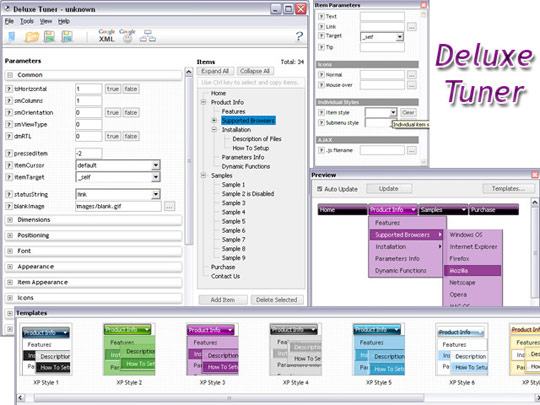
So, in the Deluxe Tuner you should enter 'open_popup' object ID in the onMouseOver,onClick or onMouseOut fields.
Actually you can assign id to any object on your page manually. Switch to 'Code' mode andadd id="open_popup" for <a>, <div>, <img> ... tags.
> Can I have two separate pop-up within the same html page?
You can add as many popups as you want.
> Can I create a popup window html that fly's out after 10 secondsCreate popup window and set openAfter=10 parameter to it. You can find this parameter in'Actions' section.
> and within> that fly out have a link that opens another pop up with important info in it using the iframe feature?Use HTML content as window content. Set winContent parameter in 'Common' section.
Add link inside the html content:
<a title='Click to open sample' href='javascript:;' onclick=\"deluxePopupWindow.open(\'window1\', \'files/test.html\', \'Window2\',\'width=220,height=270,resizable,scrollbars=no,middle,right,fade-effect\', \'default\', \'iframe\')\">Click to open Popup Window with 'files/test.html'content.</a>
More info about deluxePopupWindow.open() function you can find:
http://deluxepopupwindow.com/window-installation-info.html
function deluxePopupWindow.open("winID", "content", "header", "param", "skin", "contentType")
Use another winID (first parameter) than you have in your data file if you don't want to close 1-st popup window or use thesame winID=win if you want to close 1-st popup.
content - will be the path to the file you want to load in your popup (files/test.html)
skin - is the name of your skin (default in my example)
contentType - set this parameter to iframe.Q: Your floatable menu only works for deluxe menu and not cool tab menu.
Is this feature available or no? I put floatable menu = 1 and it does not do anything.
A: Floatable feature in cool tab menu works only with absolute position:
var babsolute=1;