Css Horizontal Toolbar by Deluxe-Menu.com
Css Horizontal Toolbar

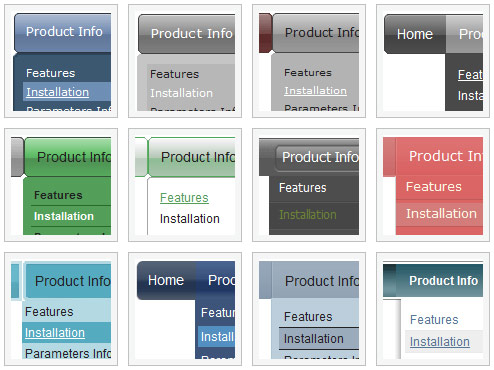
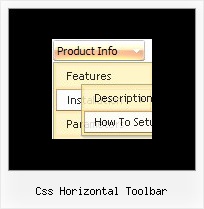
Menu Screenshots

Css Horizontal Toolbar Menu Java Source Code

Features

Unrivalled Features
  • Scrollable, dragable, floating, right-click menus
  • Keyboard navigation - press Ctrl+F2 to enter the menu
  • Unique Java Script API for altering menu "on-the-fly", without page reloading
  • AJAX technology - loads menu data from the server "on-fly and on-demand".
  • Search feature - add the search area in the menu and type symbols. The found words will be higlighted.
  • Sound support!
Compatibility              
  • Full cross-browser compatibility including IE, Netscape, Mozilla, Opera, Firefox, Konqueror and Safari on Windows, Mac OS and Linux
  • Menu can be populated from a database using ASP, PHP, etc.
  • Search engine friendly
  • Support for any doctypes
  • Fits for secure sites
  • Section 508 compliant
Collapsible Slide Menu Css Horizontal Toolbar
Cost Effective
Easy Setup
  • De Luxe Tuner. GUI interface to create your css horizontal toolbar menus easily and in no time
  • Sensible menu parameters for manual editing
High Performance
  • AJAX menu loading - loads web menu data from the server "on-the-fly".
  • Commonly loads quicker than other html page elements
  • UL/LI items structure
  • Runs well with an unlimited number of submenus and items


2.0 Buttons by Web-Buttons.com v3.0.0

Javascript Menu. DHTML Menu.

  • Good navigation is an important step to website success. If people can't find their way around the site, they will quickly give up looking and leave, never to return. So, it's absolute vital that your website has a fast, neat, and eye-pleasing navigation.
    Don't allow your website visitors to get lost. Try Deluxe Menu!

Recent Questions

Q: Hi, I was wondering if there is a way to leave a main navigation item highlighted when in that section.  For example if I clicked on "Contact Us" and when I am on the contact us page, the "Contact us" navigation would still be highlighted.  I appreciate any help you might have, thanks!


A: The menu has only two states normal and mouseover. We'll try to add the pressed state in the future.

You can set a pressed item using Javascript API:

function dm_ext_setPressedItem (menuInd, submenuInd, itemInd, recursion)

Sets a current pressed item.
menuInd - index of a menu on a page, >= 0.
submenuInd - index of a submenu, >= 0.
itemInd - index of an item, >=0.
recursion = true/false - highlight parent items.

But notice, to use dm_ext_setPressedItem() you should know ID of selected item and subitem.You can't get this ID after you reload your page. That is why you should write your own code on PHP.


Q: I just noticed as well that I cannot change the spacing of the buttons.
Right now the buttons are tight together, how do I create a gap between each button in the link drop down menu?

A: You can paste the separator.
You should add separators between your items, use "Add separator" button on the mainwidow of Deluxe Tuner.

  var menuItems = [

["FHSA","", "", "", "", "", "", "", "", "", "", ],
["-","", "", "", "", "", "", "", "", "", "", ],
["Chapters","", "", "", "", "", "", "", "", "", "", ],
["-","", "", "", "", "", "", "", "", "", "", ],
["AZ Resources","", "", "", "", "", "", "", "", "", "", ],
["-","", "", "", "", "", "", "", "", "", "", ],
["Double Butte Cemetery","", "", "", "", "", "", "", "", "", "", ],
["-","", "", "", "", "", "", "", "", "", "", ],
["Surname List","", "", "", "", "", "", "", "", "", "", ],
["-","", "", "", "", "", "", "", "", "", "", ],
["Helping Hands","", "", "", "", "", "", "", "", "", "", ],
["-","", "", "", "", "", "", "", "", "", "", ],
["Book Fund Purchases","", "", "", "", "", "", "", "", "", "", ],
];

  var separatorVImage="separv1.gif";
  var separatorVWidth="1px";
  var separatorVHeight="21px";


Q: In the standard drop down menu scripts you show a combo box and a search text box. Where are the parameters and/or style options to do this?

A: You can paste any html code inside item text, see example here:
http://deluxe-tree.com/data-samples/tree-menu1.js

["+Support", "", "icon5_t.gif", "icon5_to.gif", "", "Support Tip"],
["|Index &nbsp;<select style='width:120px;height:17px;font:normal 10px Tahoma,Arial;'><option> Section 1<option>Section 2<option>Section 3</select>", "", "", "", "", "","", "0"],
["|Search <input type=text style='width:80px;height:17px;font:normal 10px Tahoma,Arial;'>&nbsp;&nbsp; <input type=button value='Go'style='width:30px;height:17px;font:normal 10px Tahoma,Arial;'>", "", "", "", "", "", "", "0"],
["|Write Us", "mailto:[email protected]", ""],
["|<INPUT TYPE=checkbox CHECKED ID=chk1 onclick='choosebox1()'>Uncheck this check box for some free advice","","","",],

["<img src='img/sep.gif' width=113 height=1>"],


Q: How do I get my existing HTML code inside the rollover tabs?


A: You should paste your content in the <div> .. </div> tags.

<div id="content1" style=" visibility: hidden;" class="tabPage">
<p align=center><img src="img/logo_DM.gif" width=262 height=56 alt="Deluxe-Menu.com"></p>
</div>

<div id="content2" style="visibility: hidden;" class="tabPage">
<p align=center><img src="img/logo_DT.gif" width=262 height=56 alt="Deluxe-Tree.com"></p>
</div>

<div id="content3" style=" visibility: hidden;" class="tabPage">
<p align=center><img src="img/logo_DTabs.gif" width=254 height=58 alt="Deluxe-Tabs.com"></p>
</div>

See in Deluxe Tabs there are two modes:

1.   var tabMode=0;
You can create only one level of tabs and assign Object Id's of theDIV's to show when you click on the tab.

["XP Tab 1","content1", "", "", "", "", "", "", "", ],
["XP Tab 2","content2", "", "", "", "", "", "", "", ],
["XP Tab 3","content3", "", "", "", "", "", "", "", ],
["XP Tab 4","content4", "", "", "", "", "", "", "", ],

2.   var tabMode=1;
You can assign only links in this mode.
You should create top level items with subitems.

["XP Tab 1","", "", "", "", "", "", "", "", ],
 ["|Link 1_1","http://deluxe-tabs.com", "", "", "", "", "0", "", "", ],
 ["|Link 1_2","testlink.htm", "", "", "", "", "0", "", "", ],
 ["|Link 1_3","testlink.htm", "", "", "", "", "0", "", "", ],
 ["|Link 1_4","testlink.htm", "", "", "", "", "0", "", "", ],
 ["|Link 1_5","testlink.htm", "", "", "", "", "0", "", "", ],
["XP Tab 2","", "", "", "", "", "", "", "", ],
 ["|Link 2_1","testlink.htm", "", "", "", "", "0", "", "", ],
 ["|Link 2_2","testlink.htm", "", "", "", "", "0", "", "", ],
 ["|Link 2_3","testlink.htm", "", "", "", "", "0", "", "", ],
 ["|Link 2_4","testlink.htm", "", "", "", "", "0", "", "", ],
 ["|Link 2_5","testlink.htm", "", "", "", "", "0", "", "", ],
["XP Tab 3","", "", "", "", "", "", "", "", ],
 ["|Link 3_1","testlink.htm", "", "", "", "", "0", "", "", ],
 ["|Link 3_2","testlink.htm", "", "", "", "", "0", "", "", ],
 ["|Link 3_3","testlink.htm", "", "", "", "", "0", "", "", ],
 ["|Link 3_4","testlink.htm", "", "", "", "", "0", "", "", ],
 ["|Link 3_5","testlink.htm", "", "", "", "", "0", "", "", ],

You can use Object ID as well as Link in both modes.
Use the following prefixes within item's link field:

"object:" - means that there is object id after it;
"link:" - means that there is a link after it.
"javascript:" - means that there is a javascript code after it, for example:javascript:alert(\'Hello!\')

So, you should write for example:

 ["|Link 1_1","object:Content1_1", "", "", "", "", "0", "", "", ],