Recent Questions
Q: I purchased your product yesterday and was quite impressed, but I am having a bit of aproblem with my submenuitems. In the general menu properties there is a "Global" vartitemHeight = 22; My problem is that I would like my upper level of my dhtml tree to have one itemheight and my submenuitems to have a smaller height.Is this possible?
A: In the XP Style
var tXPStyle=1;
the item's height for the top items and submenus will be different.
If you want to use
var tXPStyle=0;
you can set ite's height for the submenus:
var titemHeight=16;
And for other items use the blank icon with the height you want to have for the upper
level of your menu items.
Q: Is it possibly that menu dynamic remembers the last action if I go to previous page?(so the menu stays fault out)
I know TreeMenu does this, but I want to use DeLuxeMenu
A: Deluxe Menu doesn't save state as Deluxe Tree.
But you can set pressed item on each page with Deluxe Menu using
dm_ext_setPressedItem () funtion.
Find more info:
http://deluxe-menu.com/highlighted-items-sample.html Q: I just purchased your multiple site bundle and have a menu question.
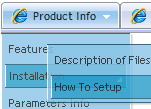
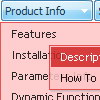
I need to create a menu for a site that has the top level menu have no border but I want any of the sub menu popups to have a border around them (or a different background color for the menu area for the popup). I can not see a way to do this? If a put a menu border on it appears on both the top level and any submenu popups.
A: You should use Individual Item Styles.
You should set the following parameters:
1) var menuBorderWidth=0;
2) Create Submenu Style
var menuStyles = [
["menuBorderWidth=1","menuBorderStyle=solid","menuBorderColor=#7E5927"], //style 0
];
You can do it in Deluxe Tuner. Click "Edit Individual Styles" and thenchoose "Submenu Styles" tab.
3) Assign Individual Style for your submenus.
You can assign them only for the first item in each submenu.
For example:
var menuItems = [
["Home","testlink.html", "", "", "", "", "", "", "", ],
["Product Info","", "default.files/icon1.gif", "default.files/icon1o.gif", "", "", "", "", "", ],
["|Features","testlink.html", "default.files/icon2.gif", "default.files/icon2o.gif", "", "", "", "0", "", ], //style 0
["|Installation","", "default.files/icon2.gif", "default.files/icon2o.gif", "", "", "", "", "", ], ["||Description of Files","testlink.html", "default.files/icon6.gif", "default.files/icon6o.gif", "", "", "", "0", "", ], //style 0
["||How To Setup","testlink.html", "default.files/icon6.gif", "default.files/icon6o.gif", "", "", "", "", "", ],
["|Parameters Info","testlink.html", "default.files/icon2.gif", "default.files/icon2o.gif", "", "", "", "", "", ],
Q: There does not appear to be any information how to display the content of a selected tab for the tab menu
A: If you want to see the content below your tab menu:
you should paste your content in the <div> .. </div> tags.
<div id="content1" style=" visibility: hidden;" class="tabPage">
<p align=center><img src="img/logo_DM.gif" width=262 height=56 alt="Deluxe-Menu.com"></p>
</div>
<div id="content2" style="visibility: hidden;" class="tabPage">
<p align=center><img src="img/logo_DT.gif" width=262 height=56 alt="Deluxe-Tree.com"></p>
</div>
<div id="content3" style=" visibility: hidden;" class="tabPage">
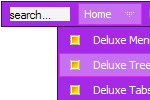
<p align=center><img src="img/logo_DTabs.gif" width=254 height=58 alt="Deluxe-Tabs.com"></p>
</div>
See in Deluxe Tabs there are two modes:
1. var tabMode=0;
You can create only one level of tabs and assign Object Id's of theDIV's to show when you click on the tab.
["XP Tab 1","content1", "", "", "", "", "", "", "", ],
["XP Tab 2","content2", "", "", "", "", "", "", "", ],
["XP Tab 3","content3", "", "", "", "", "", "", "", ],
["XP Tab 4","content4", "", "", "", "", "", "", "", ],
2. var tabMode=1;
You can assign only links in this mode.
You should create top level items with subitems.
["XP Tab 1","", "", "", "", "", "", "", "", ],
["|Link 1_1","http://deluxe-tabs.com", "", "", "", "", "0", "", "", ],
["|Link 1_2","testlink.htm", "", "", "", "", "0", "", "", ],
["|Link 1_3","testlink.htm", "", "", "", "", "0", "", "", ],
["|Link 1_4","testlink.htm", "", "", "", "", "0", "", "", ],
["|Link 1_5","testlink.htm", "", "", "", "", "0", "", "", ],
["XP Tab 2","", "", "", "", "", "", "", "", ],
["|Link 2_1","testlink.htm", "", "", "", "", "0", "", "", ],
["|Link 2_2","testlink.htm", "", "", "", "", "0", "", "", ],
["|Link 2_3","testlink.htm", "", "", "", "", "0", "", "", ],
["|Link 2_4","testlink.htm", "", "", "", "", "0", "", "", ],
["|Link 2_5","testlink.htm", "", "", "", "", "0", "", "", ],
["XP Tab 3","", "", "", "", "", "", "", "", ],
["|Link 3_1","testlink.htm", "", "", "", "", "0", "", "", ],
["|Link 3_2","testlink.htm", "", "", "", "", "0", "", "", ],
["|Link 3_3","testlink.htm", "", "", "", "", "0", "", "", ],
["|Link 3_4","testlink.htm", "", "", "", "", "0", "", "", ],
["|Link 3_5","testlink.htm", "", "", "", "", "0", "", "", ],
You can use Object ID as well as Link in both modes. Use the following prefixes within item's link field:
"object:" - means that there is object id after it;
"link:" - means that there is a link after it.
"javascript:" - means that there is a javascript code after it, for example:javascript:alert(\'Hello!\')
So, you should write for example:
["|Link 1_1","object:Content1_1", "", "", "", "", "0", "", "", ],