Recent Questions
Q: Hello I purchased the deluxe menu for single website. I have a mac computer and cant open the exe installation file of drop down menu maker inside of it. Can I get around this problem? Please help asap.
A: Download trial package from our website on MAC.
You can find HTML version of drop down menu maker (MAC version) there.
See more info:
http://deluxe-menu.com/deluxe-tuner-info.html
Q: I can't figure out how to get menu items to swap images to use like a traditional image rollover. In the Dhtml menu, I can change the style background without needing images, or I can use generic images as a background, but I have situations where I need to use unique images for each state of a button.
These unique image buttons contain text and graphics, and there are different images for different states: normal, mouse over, mouse down.
A: The menu has only two states normal and mouseover.
You should use Individual Item Styles.
Please, see the example of Deluxe Menu here:
http://deluxe-menu.com/data-templates/vista-style-02-template-sample.html
You should use "itemBackImage" parameter.
var itemStyles = [
["itemWidth=92px","itemBorderWidth=0","fontStyle=normal 11px Tahoma","fontColor=#FFFFFF,#FFFFFF","itemBackImage=btn_greenblack.gif,btn_green.gif"],
];
Q: Thanks. The newer version looks clean and neat (especially with Google Chrome). Awesome Product and keep it up.
As mentioned in this email below, we currently have two licenses and would like to add the date picker and dhtml modal popup included also. Please let me know of the process along with any additional incremental cost.
A: You can find popup window in Deluxe Tuner:
c:\Program Files\Deluxe Menus\deluxe-menu\deluxe-tuner\
Calendar you can find here:
c:\Program Files\Deluxe Menus\calendar\
More info about installation you can find on our websites:
http://www.calendardatepicker.com/
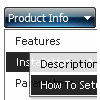
http://deluxepopupwindow.com/Q: We dont want to change the Target, Target will be always _self, but sometime the user would like to open links of easy drop down menu in a new window.
We just wnat to know if posible to do it.
A: I think that it is not possible to create such menu using Pop up menu.
But you can try to write your menuItems in the following way:
["|<a href='http://deluxe-menu.com/parameters-info.html'>Parameters Info</a>","", "", "", "", "", "", "", "", ],
Right click on the "Product Info/Parameters Info" item.
But you should create correct style for <a> tag.