Flex Horizontal Menu Icon by Deluxe-Menu.com
Flex Horizontal Menu Icon

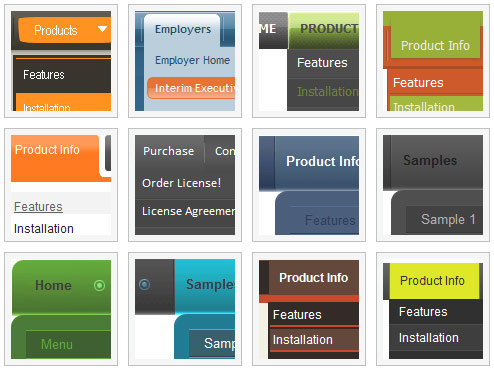
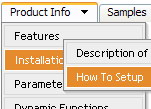
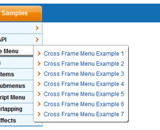
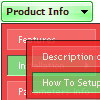
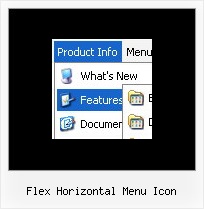
Menu Screenshots

Flex Horizontal Menu Icon Navigation Sample Javascript Download

Features

Cost Effective
Compatibility              
  • Full cross-browser compatibility including IE, Netscape, Mozilla, Opera, Firefox, Konqueror and Safari on Windows, Mac OS and Linux
  • Menu can be populated from a database using ASP, PHP, etc.
  • Search engine friendly
  • Support for any doctypes
  • Fits for secure sites
  • Section 508 compliant
Javascript Menu Object Submenu Flex Horizontal Menu Icon
Seamless Integration
  • Cross-frame support - menus work on frameset-based pages
  • Visible over flash, select boxes, iframes, java applets
  • Multiple menus on the same page
  • Amicable to other scripts and css styles
  • Any HTML code can be used inside menu items
High Performance
  • AJAX menu loading - loads web menu data from the server "on-the-fly".
  • Commonly loads quicker than other html page elements
  • UL/LI items structure
  • Runs well with an unlimited number of submenus and items
Easy Setup
  • De Luxe Tuner. GUI interface to create your flex horizontal menu icon menus easily and in no time
  • Sensible menu parameters for manual editing


2.0 Buttons by Web-Buttons.com v3.0.0

Javascript Menu. DHTML Menu.

  • There can be multi level menus - create as many rows or columns of the menu as you want.
  • Use a mouse to drag a menu as a usual window. Also you can construct the menu where each submenu can be "detached" from the main menu (MSOfficeToolbarLike mode).
  • When the page is scrolled the menu remains visible. The DHTML menu can "float" along one or two coordinate axes.

Recent Questions

Q: I wanted to know how to hide/ disable a menu item for a particular user/roleid in dreamweaver dhtml menu..


A: You can find more info here:

http://deluxe-menu.com/dynamic-functions-sample.html

You can try to use API functions in that case:

function dm_ext_changeItemVisibility (menuInd, submenuInd, itemInd, visibility)

To disable items you should set the target parameter to "_".

You can try to use the following function

function disable()
{
dm_ext_changeItem(0, 1, 1, ["", "", "", "", "", "_"]);

}

to disable your items.


Q: Would it be possible at some point to introduce more font decoration options to the mouseover variables, I would like to add bold as a mouseover font decoration, but obviously this is not possible at the moment.


A: Unfortunately, Deluxe Menu doesn't have such a feature. You can onlyset it's color. You cannot set the font of menu item bold when selected.

You should addthe following code in your data file:

function changeFont(obj, over)
{
obj.style.fontWeight = over ? 'bold' : 'normal';
obj.style.fontSize = over ? '13px' : '12px'; // You can not use this line
}

  var menuItems = [

["<div onMouseOver='changeFont(this, 1)' onMouseOut='changeFont(this, 0)'>Security</div>","", "", "", "", "", "", "", "", ],
["<div onMouseOver='changeFont(this, 1)' onMouseOut='changeFont(this, 0)'>Ease of Access</div>","", "", "", "", "", "", "", "", ],
["|<div onMouseOver='changeFont(this, 1)' onMouseOut='changeFont(this, 0)'>Internet Options</div>","", "", "", "", "", "", "", "", ],
["|<div onMouseOver='changeFont(this, 1)' onMouseOut='changeFont(this, 0)'>Windows Firewall</div>","", "", "", "", "", "", "", "", ],
["<div onMouseOver='changeFont(this, 1)' onMouseOut='changeFont(this, 0)'>Network and Internet</div>","", "", "", "", "", "", "", "", ],
["<div onMouseOver='changeFont(this, 1)' onMouseOut='changeFont(this, 0)'>Hardware</div>","", "", "", "", "", "", "", "", ],


Q: I use your licensed deluxe menu and I got a customer specific issue:

Is it possible to set no background color for the menus first level and a background color for all submenus?

I couldn't find a parameter to set different variables for main level and sublevels...

Thank you for your feedback

A: You should use Individual Styles for your subitems.

  var menuBackColor="";
  var itemBackColor=["",""];

  var itemStyles = [
["itemBackColor=#81BEC9,#CCE6EA"], //style0
];
["Home","testlink.html", "", "", "", "", "", "", "", ],
["Product Info","", "default.files/icon1.gif", "default.files/icon1o.gif", "", "", "", "", "", ],
 ["|Features","testlink.html", "default.files/icon2.gif", "default.files/icon2o.gif", "", "", "0", "", "", ], //style
 ["|Installation","", "default.files/icon2.gif", "default.files/icon2o.gif", "", "", "0", "", "", ],//style0
   ["||Description of Files","testlink.html", "default.files/icon6.gif", "default.files/icon6o.gif", "", "", "", "", "", ],
   ["||How To Setup","testlink.html", "default.files/icon6.gif", "default.files/icon6o.gif", "", "", "", "", "", ],
 ["|Parameters Info","testlink.html", "default.files/icon2.gif", "default.files/icon2o.gif", "", "", "0", "", "", ],//style0


Q: I am trying to follow your directions on how to load the application and I am completely lost as to what I need to do.
Do you have instructions on how operate the application; I am having a very difficult problem trying to maneuver around.
I am looking to create css vertical tabs, and the tabs are my personal images and I want to place html text into tabs.


A: To set your own images for tabs you should use the following
parameters (see how we created images in the attached example):

  var bitemBackImage=["img/styleIE7_n_back.gif","img/styleIE7_o_back.gif","img/styleIE7_s_back.gif"];
  var bbeforeItemImage=["img/styleIE7_n_left.gif","img/styleIE7_o_left.gif","img/styleIE7_s_left.gif"];
  var bafterItemImage=["img/styleIE7_n_right.gif","img/styleIE7_o_right.gif","img/styleIE7_s_right.gif"];

You can also use a whole images for you tabs you should use only
  var bitemBackImage=["img/styleIE7_n_back.gif","img/styleIE7_o_back.gif","img/styleIE7_s_back.gif"];

Set the dimensions of the menu here:
  var bmenuWidth="600px";
  var bmenuHeight="33px";


See in Deluxe Tabs there are two modes:

1.   var tabMode=0;
You can create only one level of tabs and assign Object Id's of the
DIV's to show when you click on the tab.

["XP Tab 1","content1", "", "", "", "", "", "", "", ],
["XP Tab 2","content2", "", "", "", "", "", "", "", ],
["XP Tab 3","content3", "", "", "", "", "", "", "", ],
["XP Tab 4","content4", "", "", "", "", "", "", "", ],

2.   var tabMode=1;
You can assign only links in this mode.
You should create top level items with subitems.

["XP Tab 1","", "", "", "", "", "", "", "", ],
 ["|Link 1_1","http://deluxe-tabs.com", "", "", "", "", "0", "", "", ],
 ["|Link 1_2","testlink.htm", "", "", "", "", "0", "", "", ],
 ["|Link 1_3","testlink.htm", "", "", "", "", "0", "", "", ],
 ["|Link 1_4","testlink.htm", "", "", "", "", "0", "", "", ],
 ["|Link 1_5","testlink.htm", "", "", "", "", "0", "", "", ],
["XP Tab 2","", "", "", "", "", "", "", "", ],
 ["|Link 2_1","testlink.htm", "", "", "", "", "0", "", "", ],
 ["|Link 2_2","testlink.htm", "", "", "", "", "0", "", "", ],
 ["|Link 2_3","testlink.htm", "", "", "", "", "0", "", "", ],
 ["|Link 2_4","testlink.htm", "", "", "", "", "0", "", "", ],
 ["|Link 2_5","testlink.htm", "", "", "", "", "0", "", "", ],
["XP Tab 3","", "", "", "", "", "", "", "", ],
 ["|Link 3_1","testlink.htm", "", "", "", "", "0", "", "", ],
 ["|Link 3_2","testlink.htm", "", "", "", "", "0", "", "", ],
 ["|Link 3_3","testlink.htm", "", "", "", "", "0", "", "", ],
 ["|Link 3_4","testlink.htm", "", "", "", "", "0", "", "", ],
 ["|Link 3_5","testlink.htm", "", "", "", "", "0", "", "", ],

You can use Object ID as well as Link in both modes. Use the following prefixes within item's link field:
"object:" - means that there is object id after it;
"link:" - means that there is a link after it.
"javascript:" - means that there is a javascript code after it, for example:javascript:alert(\'Hello!\')

So, you should write for example:

 ["|Link 1_1","object:Content1_1", "", "", "", "", "0", "", "", ],