Recent Questions
Q: I was wondering if you could help me. I have recently done a site and put a menu into the site
The basic javascript menu is on the top of the screen but it has lines through each of the menus just after the words and before the arrow on each of them. I have stretched the menu out to cover the whole of the top of the page but i need to get these lines out of the menu.
Can you please help me with this problem?
A: See images in Vista Templates have the fixed width and height (92 x 21):
var itemStyles = [
["itemWidth=92px","itemHeight=21px","itemBackColor=transparent,transparent","itemBorderWidth=0","fontStyle=normal 11pxTahoma","fontColor=#3A3A3A,#000000","itemBackImage=data-vista-2-04.files/btn_olive.gif,data-vista-2-04.files/btn_white.gif"],
];
When items text is too long you can have such effect.
You can try to use combined background for your items, for example:
var beforeItemImage = [,]; //left-side image for normal and mouse over state
var itemBackImage = [,]; //background or image for normal and mouse over state
var afterItemImage = [,]; //right-side image for normal and mouse over state
var beforeItemImageW = '';
var afterItemImageW = '';
var beforeItemImageH = '';
var afterItemImageH ='';
But you should create a small images in any Graph Editor, for example:
button_n_back.gif
button_n_left.gif
button_n_right.gif
button_o_back.gif
button_o_left.gif
button_o_right.gif
Q: Will html navigation bar work with site created using FrontPage?
A: Yes, Deluxe CSS Menu will work fine with site created in Frontpage.
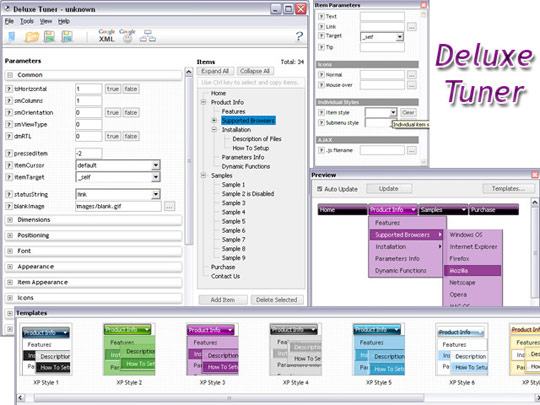
Add all code generated by Deluxe Tuner.
You should copy all css styles for the menu and add it into your own .css file (orcreate a new .css file for the menu and call it on your page).
Then copy all HTML code for the menu and paste it in the place where you want to have amenu.
To view css styles and html code click "View HTML" button on the Preview window in theDeluxe Tuner.
Q: Is it possible to hide the plus signs so only the icon and the menu text show?
A: Yes, you can do it.
You should write so:
//------- Buttons -------
var texpandBtn = ["","",""];
var texpandBtnW = "";
var texpandBtnH = "";
var texpandBtnAlign = "left";
Q: I am using the GUI, and have read in your literature that you can put the HTML table in the text area of the javascript select menu item.
However, when I do this nothing displays. Can you please let me know where I a supposed to put the HTML info into the gui. I just want this to be able to show when I click the tab.
A: You should paste your content in the <div> .. </div> tags.
<div id="content1" style=" visibility: hidden;" class="tabPage">
<br><br><br>
<p align=center><img src="img/logo_DM.gif" width=262 height=56 alt="Deluxe-Menu.com"></p>
</div>
<div id="content2" style="visibility: hidden;" class="tabPage">
<br><br><br>
<p align=center><img src="img/logo_DT.gif" width=262 height=56 alt="Deluxe-Tree.com"></p>
</div>
<div id="content3" style=" visibility: hidden;" class="tabPage">
<br><br><br>
<p align=center><img src="img/logo_DTabs.gif" width=254 height=58 alt="Deluxe-Tabs.com"></p>
</div>
See in Deluxe Tabs there are two modes:
1. var tabMode=0;
You can create only one level of tabs and assign Object Id's of theDIV's to show when you click on the tab.
["XP Tab 1","content1", "", "", "", "", "", "", "", ],
["XP Tab 2","content2", "", "", "", "", "", "", "", ],
["XP Tab 3","content3", "", "", "", "", "", "", "", ],
["XP Tab 4","content4", "", "", "", "", "", "", "", ],
2. var tabMode=1;
You can assign only links in this mode.
You should create top level items with subitems.
["XP Tab 1","", "", "", "", "", "", "", "", ],
["|Link 1_1","http://deluxe-tabs.com", "", "", "", "", "0", "", "", ],
["|Link 1_2","testlink.htm", "", "", "", "", "0", "", "", ],
["|Link 1_3","testlink.htm", "", "", "", "", "0", "", "", ],
["|Link 1_4","testlink.htm", "", "", "", "", "0", "", "", ],
["|Link 1_5","testlink.htm", "", "", "", "", "0", "", "", ],
["XP Tab 2","", "", "", "", "", "", "", "", ],
["|Link 2_1","testlink.htm", "", "", "", "", "0", "", "", ],
["|Link 2_2","testlink.htm", "", "", "", "", "0", "", "", ],
["|Link 2_3","testlink.htm", "", "", "", "", "0", "", "", ],
["|Link 2_4","testlink.htm", "", "", "", "", "0", "", "", ],
["|Link 2_5","testlink.htm", "", "", "", "", "0", "", "", ],
["XP Tab 3","", "", "", "", "", "", "", "", ],
["|Link 3_1","testlink.htm", "", "", "", "", "0", "", "", ],
["|Link 3_2","testlink.htm", "", "", "", "", "0", "", "", ],
["|Link 3_3","testlink.htm", "", "", "", "", "0", "", "", ],
["|Link 3_4","testlink.htm", "", "", "", "", "0", "", "", ],
["|Link 3_5","testlink.htm", "", "", "", "", "0", "", "", ],
You can use Object ID as well as Link in both modes. Use the following prefixes within item's link field:
"object:" - means that there is object id after it;
"link:" - means that there is a link after it.
"javascript:" - means that there is a javascript code after it, for example:javascript:alert(\'Hello!\')
So, you should write for example:
["|Link 1_1","object:Content1_1", "", "", "", "", "0", "", "", ],